Sunday, November 25, 2012

Google Analytics statistics


From the beginning of this project, I was curious to know if people would connect to my teapot. I initially planned to create a counter or a statistics module simple PHP. But after discovering Google Analytics, I finally decided to use it.

Of course, very precise statistics aren't necessary for a simple teapot project, but this module can be activated simply by adding a javascript code on the page to be checked, which made the task very easy.


Since the implementation of Analytics on November 4th, the teapot received 574 unique visitors. The first surprise came from a peak of 143 visits in one day, I can't explain it. But Google Analytics also provides impressive details on the website visitors. You can know the browser, the origin website, the used browser and other relevant information such as country of origin of visitors. This information was what I was most curious about.

As I mentioned my site to friends, I received many visits from France: 109. I also received 109 visits from the United States. What surprised me most is that the first country of my visitors is Finland with 110 visitors. But is it really a surprise that the country that gave us Linus Torvalds, Nokia phones and Angry Birds also hosts many geeks interested in the error 418?

Sunday, November 18, 2012

How to install a web server on Raspberry Pi - Lighttpd


http://www.lighttpd.net/Lighttpd (http://www.lighttpd.net/) is an open source webserver which has reputation of being very light. Therefore it looks perfect for an Raspberry Pi. Here are the commands I used to install it


Lighttpd installation
sudo apt-get install lighttpd


The directory containing the web pages is:
 /var/www"


The "pi" user does not have write permission to this directory.
You can give these rights with the following set of commands:

sudo chown www-data:www-data /var/www (to make the www-data owner of the directory)

sudo chmod 777 /var/www (to have full right to this directory)
sudo usermod -a -G www-data pi (to had the pi user to the www-data group)


You can now had your html file to the "/var/www" directory.

The configuration file is:
/etc/lighttpd/lighttpd.conf

The error log is:
/var/log/lighttpd/error.log

The command to restart the server:
sudo /etc/init.d/lighttpd restart

The command to reload the configuration
sudo service lighttpd force-reload

The server is ready. It is possible to use PHP and other services with Lighttpd, but I didn't do it so I can't explain it here.

Wednesday, November 14, 2012

How to exchange files between Windows and Raspberry Pi - WinSCP

In addition to be able to control the Raspberry from a Windows PC, you sometimes need to exchange files between the two systems. There are two protocols based on SSH for this, SCP (Secure CoPy) and SFTP (SSH file transfer protocol). These protocols are used to exchange files securely with a system using SSH and are equivalent, though SFTP is more recent..

WinSCP can use both protocols from Windows.

WinSCP
http://sourceforge.net/projects/winscp/
In the main interface you can choose between SFTP and SCP protocols, specify the IP address of the Raspberry Pi, the user "pi" and the password.


Once connected, you can browse in the Windows system on the left side and in the Linux system on the right side and exchange files between them by drag and drop.


Sunday, November 11, 2012

How to control the Raspberry Pi from Windows: SSHputty

Sometime your Raspberry Pi (or another Linux computer) is not physically accessible and that you can't connect any keyboard or screen. It may occurs when it is enclosed in a teapot.

It is necessary in this situation to find tools to drive it from another computer, connected in the same network.

I therefore suggest you to use the SSH (Secure Shell) service with the client software SSHputty

Activate SSH
To use this tool, the SSH  service should be active. It is activated by default in Raspbian. But if necessary it is very easy to turn it on, just call the command "sudo Raspi-config"

The following menu appears and then allows to enable the SSH service.


SSHputty
http://www.putty.org/


This is an SSH client that allows you to control any system compatible with SSH command line from a Windows PC.

After installing and running it, just chose the Raspberry Pi with its IP address (and port 22) and click on "Open" button

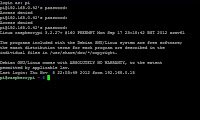
A command line interface will appear and ask for the username and password.

You can then control the Raspberry Pi with the command line interface, but not start the GUI.

Thursday, November 8, 2012

Useful commands for Raspberry Pi


Today I give you a few useful commands for an Raspberry Pi with Raspbian. I'll update this list in the future

Default login and password
login: pi    password: raspberry


Launch the GUI:
startx

Sht down the Raspberry Pi :
sudo halt

restart the Raspberry Pi :
sudo reboot

Know its IP address:
ifconfig eth0

Renew the IP address when in DHCP:
sudo dhclient eth0

Read a text file:
cat pathname

Edit a text file:
sudo nano or sudo nano pathname

Check the temperature of the Raspberry Pi:
sudo /opt/vc/bin/vcgencmd measure_temp

Raspberry Pi setup page:
sudo  raspi-config

From this page you can:
  • expand the partition
  • change the overscan (margins) of the screen
  • select keyboard layout
  • change the password of the user "pi",
  • change the local preference
  • change the time zone
  • manage shared memory,
  • enable the SSH
  • start on the GUI

System update
sudo apt-get update

Wednesday, November 7, 2012

How to wire an ethernet patch cable

To connect my Raspberry Pi to the network, from the teapot, I had wire my own cable. (Because the RJ45 connector didn't fit in the spout of the teapot)

Erevy time I had to do a cable, I ask for the same questions, so I decided to write an small tutorial here for "straight-through" cables.

What do we need?

  • patch cable
  • RJ-45 connector
  • boots
  • RJ458 crimper


1-Strip off the cable with the crimper.


2-Insert the boot, and untwist the pairs.

3-Align the wires in the right order and cut them to the same size.
The order is this one for T568B cable:
1-white/orange
2-orange
3-white/green
4-blue
5-white/blue
6-green
7-white/brown
8-brown


 4-Put the wires into the connector, and check they are still in the right order.

5-Be sure the wires are fully insered into the connector.

 6-Crimp the cable.
 

7-Just slide the boot.

The second connector is wired with the same order.

Just plug and enjoy!


Monday, November 5, 2012

It isn't fake!


I received some remarks saying that my pictures didn't show that the teapot really contains a functionnal Raspberry Pi. As an answer, I'm proud to give you some newer photos.


Sunday, November 4, 2012

Error 418 teapot beta version online


A beta version of my teapot is online at www.htcpcp.net.

I'll not give technical details in this post, but I use Raspbian with Lighttpd.

I'll write a longer post when my installation will be stable.


Saturday, November 3, 2012

Teapot purchased


The teapot was purchased today in an "Secours Populaire" shop (a french charity shop).

This geek operation is nearly a charity one now!

Impact on budget: -4€


Configuring the DNS - Episode 2

I have configured my DNS.

The two main domains following the Google instruction for blogger/blogspot sites.
-www.error418.fr for the french version of the blog
-www.error418.org for the english version.

In fact, I had to be patient and wait for the DNS propagation. You can track the propagation with some sites like http://www.whatsmydns.net/
Reducing the TTL may be an good idea, but you must do it the night before the change to be sure it is active.

The domain 418error.net is redirected to error418.org, with an .htaccess file 301 redirection.
Options +FollowSymLinks
RewriteEngine on
RewriteRule (.*) http://www.error418.org [R=301,L]

Other forms of redirection may be penalized by the Google search engine, which could be considered as "duplicate content".

To do the expriment I redirected www.error418.net with the simple redirection interface of my registar.

The www.htcpcp.net, domain will be used for my teapot, with an simple 'A' record.

Thursday, November 1, 2012

Configuring the DNS - Episode 1

I tried to configure my DNS today, and I realized that it was much more complicated than I thought, because it is necessary to consider the consequences for google referrals which penalizes the "duplicate content".

I tried several solutions:
-redirection (visible or invisible) proposed in the OVH interface: it is simple to implement, but may handicap referrals
redirection by. htaccess files seems powerful, but complex to implement, and requires host a site for each domain.
-html-forwarding: problems for referrals.
-create Cname and A records in the DNS: I have changed, and I made ​​my site inaccessible.
-blogspot interface to use a personnal domain worked a few minutes, and then made ​​my blog inaccessible

I really have to study DNS, but the blog may become inaccessible for some time.


A french version of the site

A small message, just to say that I finally decided to host a french version of the blog on the error418.fr domain. The adresses error418.net, error418.org, 418error.net and htcpcp.net, remain associated to the english version.